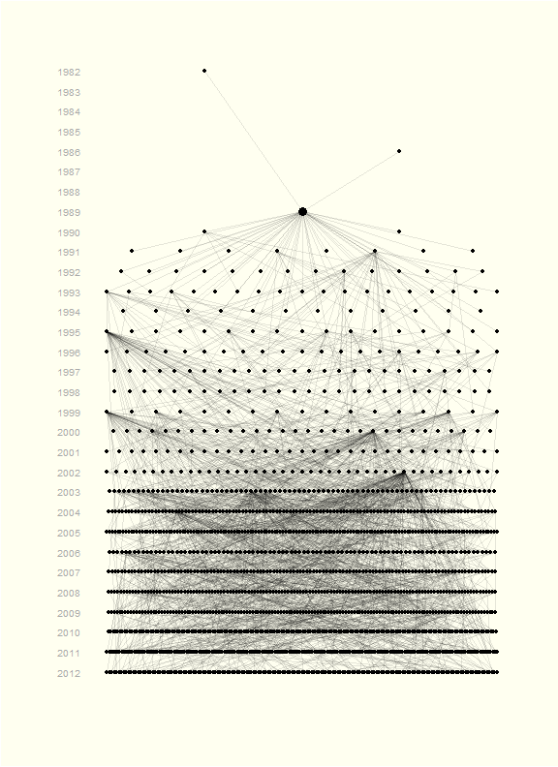
During a minor bout of procrastination, I produced a stylised pedigree using Hadley Wickham's amazing reshape and ggplot2 packages in R. Not being particularly artistically minded, I was quite chuffed with the end product:
I’ve had a few requests for the code, so in this post, I provide a step by step guide describing how the graph was produced. In a nutshell, it shows all ancestors and descendants of a single Soay sheep, called “Snowball”, who is indicated by the large dot at the top of the pedigree.
I started with the following data frame, which is a pedigree consisting of Snowball (ID number 2115), its mother and father, all his descendants and their years of birth.
head(pedigree)## ID FATHER MOTHER BirthYear
## 1 905 NA NA 1982
## 2 1721 NA NA 1986
## 3 2115 1721 905 1989
## 4 2255 2115 NA 1990
## 5 2310 2115 NA 1990
## 6 2447 2115 NA 1991tail(pedigree)## ID FATHER MOTHER BirthYear
## 1597 8966 6563 5526 2012
## 1598 8967 6486 NA 2012
## 1599 8969 5420 6725 2012
## 1600 8970 NA 7485 2012
## 1601 8971 NA 7159 2012
## 1602 8974 NA 6459 2011To start, I loaded the reshape package and used the melt function to stack MOTHER and FATHER into variable and value columns, meaning that each parent of an individual will have its own individual line. BirthYear is not important at this stage and was not included in id.vars. Lines with NAs occuring in value were removed.
library(reshape)ped2 <- melt(pedigree, id.vars=c("ID"), measure.vars=c("MOTHER", "FATHER"))
ped2 <- ped2[-which(is.na(ped2$value)),]
head(ped2)## ID variable value
## 3 2115 MOTHER 905
## 27 2778 MOTHER 2447
## 38 2922 MOTHER 2447
## 42 2938 MOTHER 2608
## 46 2983 MOTHER 2683
## 47 2997 MOTHER 2683tail(ped2)## ID variable value
## 3191 8856 FATHER 5420
## 3193 8863 FATHER 6486
## 3198 8964 FATHER 6849
## 3199 8966 FATHER 6563
## 3200 8967 FATHER 6486
## 3201 8969 FATHER 5420The column value indicates the parent ID relative to variable. Next, value is renamed to Parent.ID. To create the lines between an individual and its mother or father, each parent/offspring combination should be identified by a unique “Group” identifier. I did this as follows:
names(ped2)[which(names(ped2) == "value")] <- "Parent.ID"
ped2$Group <- 1:nrow(ped2)
head(ped2)
## ID variable Parent.ID Group
## 3 2115 MOTHER 905 1
## 27 2778 MOTHER 2447 2
## 38 2922 MOTHER 2447 3
## 42 2938 MOTHER 2608 4
## 46 2983 MOTHER 2683 5
## 47 2997 MOTHER 2683 6Now we melt again, using "Group" as the id.var, and c("ID", "Parent.ID") as measure.vars.
ped3 <- melt(ped2, id.vars = "Group", measure.vars=c("ID", "Parent.ID"))
ped3[1:10,]
## Group variable value
## 1 1 ID 2115
## 2 2 ID 2778
## 3 3 ID 2922
## 4 4 ID 2938
## 5 5 ID 2983
## 6 6 ID 2997
## 7 7 ID 3082
## 8 8 ID 3293
## 9 9 ID 3382
## 10 10 ID 3384This can then be merged with the original pedigree Birth Year information.
names(ped3)[3] <- "ID"
ped3 <- join(ped3, pedigree[,c("ID", "BirthYear")])
## Joining by: IDhead(ped3)## Group variable ID BirthYear
## 1 1 ID 2115 1989
## 2 2 ID 2778 1992
## 3 3 ID 2922 1993
## 4 4 ID 2938 1993
## 5 5 ID 2983 1993
## 6 6 ID 2997 1994
Now it looks like something we can plot – we have the connections between individuals (indicated by Group) and we have their y-axis positions (BirthYear)). But what about the x positions?
My current solution is to create a list of x coordinates that are equally distributed between 0 and 1, but are also symmetrical around 0.5 to aesthetic reasons. So if there are 5 unique individual IDs within a cohort, their x values would be sampled without replacement from c(0, 0.25, 0.5, 0.75, 1). If two individuals, then x would be sampled without replacement from c(0.25, 0.75).
generateXcoord <- function(size){

  if(size %% 2 != 0 & size != 1){   # Check if size is odd
    newsize <- size - 1
    interval <- 1/newsize
    x <- seq(0, 1, interval)
    }

  if(size %% 2 == 0){    # Check if size is even
    interval <- 1/size
    x <- seq(0, 1, interval)[-size-1] + diff(seq(0, 1, interval))/2
    }

  if(size == 1) x <- 0.5

  x
  }
generateXcoord(4)
## [1] 0.125 0.375 0.625 0.875generateXcoord(7)## [1] 0.0000 0.1667 0.3333 0.5000 0.6667 0.8333 1.0000Now loop through the pedigree and sample the x coordinates. Probably quite inefficient…
 #~~ Create an object to save the x coordinates within
xcoords <- NULL

for(i in unique(ped3$BirthYear)){

  # Extract the number of Unique IDs per year and generate X coords
  ids  <- unique(ped3$ID[which(ped3$BirthYear == i)])
  newx <- generateXcoord(length(ids)) # generate X coordinates

  # Append to xcoords
  xcoords <- rbind(xcoords,
                   data.frame(ID = ids,
                              x = sample(newx, size = length(newx), replace = F)))

  rm(ids, newx)
  }

# Merge with ped3

ped3 <- join(ped3, xcoords)
## Joining by: IDhead(ped3)## Group variable ID BirthYear x
## 1 1 ID 2115 1989 0.5000
## 2 2 ID 2778 1992 0.4643
## 3 3 ID 2922 1993 0.5556
## 4 4 ID 2938 1993 0.1111
## 5 5 ID 2983 1993 0.6667
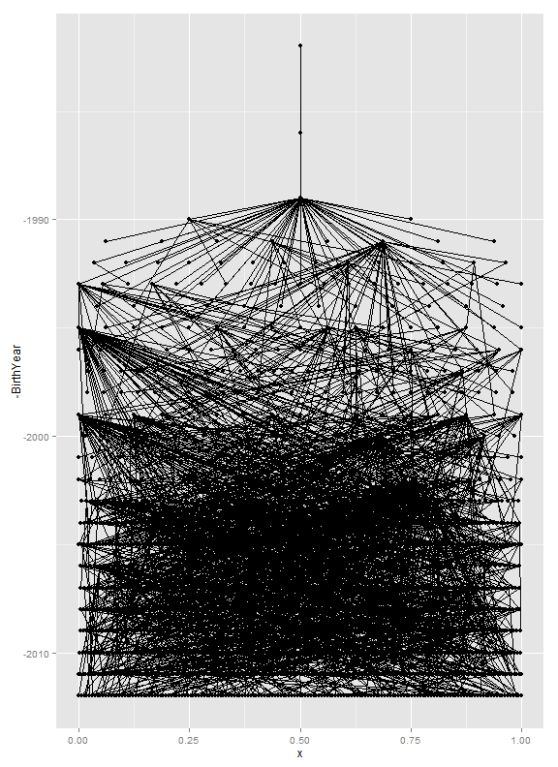
## 6 6 ID 2997 1994 0.7083NOW WE PLOT. Using -BirthYear will plot the earliest years at the top of the graph and group = Group in the geom_line() call will plot the lines connecting parents and their offspring:
library(ggplot2)
library(grid)

ggplot(ped3, aes(x, -BirthYear)) +
  geom_line(aes(group = Group)) +
  geom_point()
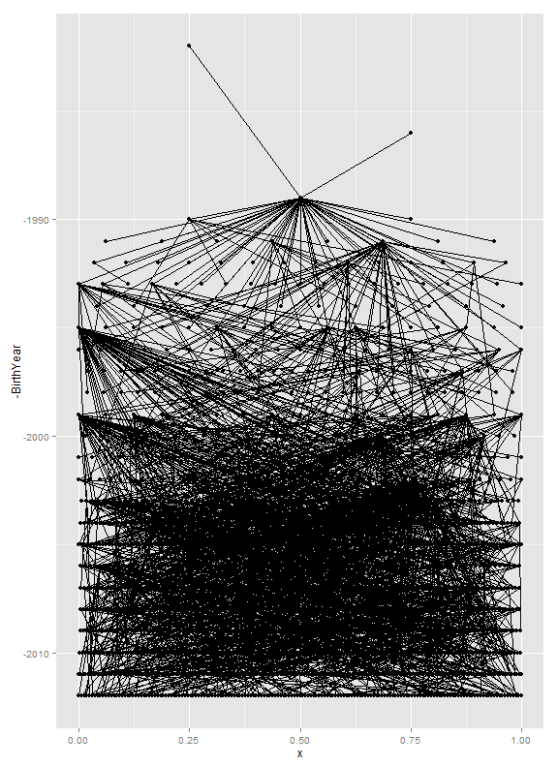
First of all, I want to change the parents of Snowball (born 1989) to be plotted on either side. This involves a slightly less automated process of assigning new values to the two parents born pre-1989:
ped3$x[which(ped3$BirthYear < 1989)] <- c(0.25, 0.75)

ggplot(ped3, aes(x, -BirthYear)) +
  geom_line(aes(group = Group)) +
  geom_point()
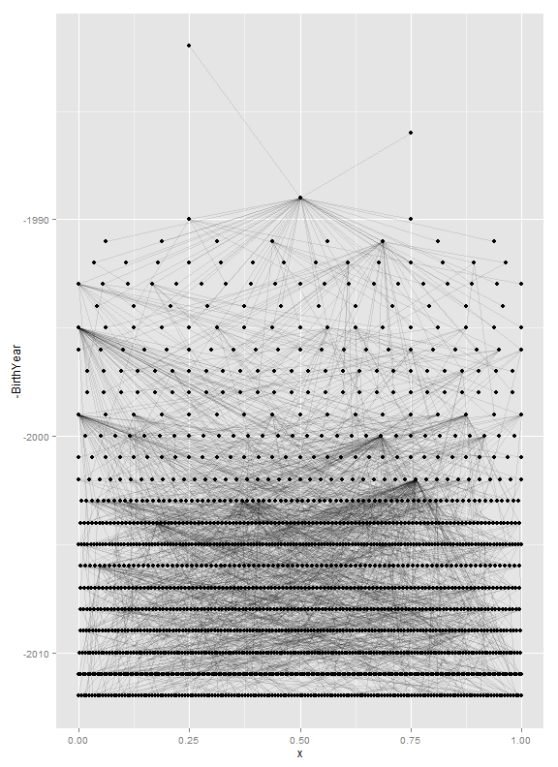
Now to customise the graph. Specifying alpha within geom_line() helps to distinguish the individual relationships within the pedigree.
ggplot(ped3, aes(x, -BirthYear)) +
  geom_line(aes(group = Group), alpha = 0.1) +
  geom_point()
And in true 'How to draw an Owl' style, lets add a shed-load of other specifications. In particular, within theme(), element_blank() removes a particular attribute, and plot.blackground is the key to getting the cream background. scale_y_continuous gives the correct labels for the y axis value and a value for each year. labs(x = "", y = "") is a little hack which removes the axis titles.
And finally, geom_point(x = 0.5, y = -1989, size = 4) superimposes a large point over Snowball:
birthyears <- sort(unique(ped3$BirthYear))

ggplot(ped3, aes(x, -BirthYear)) +
  geom_line(aes(group = Group), alpha = 0.1) +
  geom_point() +
  geom_point(x = 0.5, y = -1989, size = 4) +
  theme(legend.position  = "none",
        axis.text.x      = element_blank(),
        axis.text.y      = element_text(colour = "darkgrey"),
        axis.ticks.y     = element_blank(),
        axis.ticks.x     = element_blank(),
        panel.grid       = element_blank(),
        plot.background  = element_rect(fill = "ivory"),
        panel.background = element_blank()) +
  theme(plot.margin = unit(c(1.5, 1.5, 1.5, 1.5), units = "cm")) +
  scale_y_continuous(breaks = -seq(min(birthyears), max(birthyears), 1),
                     labels =  seq(min(birthyears), max(birthyears), 1)) +
  labs(x = "", y = "")


